Showing posts with label anna vickery. Show all posts

Sunday, 11 August 2013

DIY - Sew Your Own Tulip Skirt


This is a patternless tutorial for a tulip shaped skirt with a fitted waistband and concealed zip to the centre back.


Step 1: Lay out your folded fabric on the table, with the fold (selvedge to selvedge) running along the edge of the table.


Step 2: Measure your waist in inches where you want the skirt to sit and add one inch to this number. For example a 30 inch waist will need a 31 inch waistband. If your waist is more than 44” you will need to make a 2 part waistband.

Step 3: Draw out a long rectangle on the fabric, 5 inches by half your waistband measurement. For example a 31inch waistband will be 15.5 
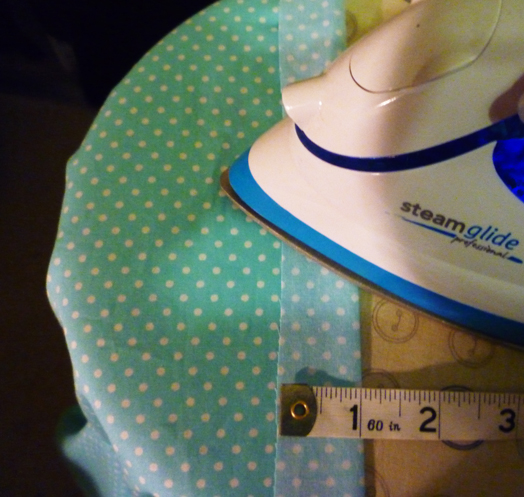
inches long on the folded fabric. Then cut this out. If you are using a light weight fabric you might want to iron interfacing to the waistband.
Step 4: Cutting the skirt. Decide how long you want the skirt to be, around 18 inches will come to just above the knee. Still with the fold of the fabric on the edge of the table draw a line a quarter of the length of your waistband, plus 8 inches for the pleats (31” waistband = 7.75” + 8” = 15.75“.) This is the top edge of the skirt. For the bottom edge of the skirt draw a parallel line from the top edge with a gap the distance you decided the skirt length to be 9.5 inches long - this should be wide enough for you to walk in the skirt without a split in the back. Cut a second piece the same.


Step 5: Cut the centre back opening by cutting along the halfway fold THROUGH ONE PIECE ONLY! You can do this with pinking shears, or overlock or bind the back seams.

Step 6: French seam the skirt side seams - a French seam is a double stitched seam, start with the wrong sides of the fabric together and stitch a half centimetre seam, then turn the fabric to have the right sides together and stitch a second line with a 1 centimetre seam.

Step 7: Pin the pleats. Start about 2 inches from the centre front of the skirt and pin 4 pleats each side of the front and back, each pleat should be about 1 inch and they should be about 2 inches apart. Turn the pleat folds to the middle of the skirt (ie.The centre front and centre back.)


Step 8: Pin the skirt to the waistband with right sides together.

Step 9: Sew your waistband to your skirt. Then fold the waistband over and pin to cover the waist seam. Hand stitch this in place.
Step 10: Sew your zip. A concealed zip is best to use with this skirt. Start by sewing the zip to the right hand edge, then fasten the zip and mark the waist seam so you can line up waistband. Sew the other side, then sew the back seam together. To finish fold over the tops of the zips behind the seams.


You can hem the skirt by turning under or binding to finish. And there you have your skirt! I would love to see photos of your skirts on, hear your feedback and answer any questions you have.


Anna Vickery 2013 Ó

Thursday, 8 August 2013

DIY - How to Make a Sun Top


This is a patternless tutorial for a Suntop with spaghetti straps and ties at the back.

Materials:
1m lightweight cotton fabric
2 x 22cm pieces of ½” wide elastic
4 x 75cm pieces of bias binding
Matching thread
Sewing machine
Pins/safety pin
Tape measure
Scissors
Tailors chalk

Step 1: Measure - measure your bust in inches, add 6” for ease and seam allowances, divide this measurement in half to get the width of your suntop. (ie.38” bust, add 6”=44”/2 = 22”)

Step 2: Cut - Press your fabric. Fold your meter of fabric in half with the selvedges/finished edges on each side, so you can use the full width of fabric if required, by 50cm length. Mark out the width of your top (ie.22”) and cut, then cut along the fold of your fabric to get 2 large rectangles of fabric. Leave the 2 rectangles of fabric on top of each other and fold in half widthways.
Using tailors chalk draw an armhole on the selvedge edge approx 2” in from the top edge by 6” deep, curve the bottom edge of the armhole. Cut the armholes out, because the fabric is folded together you can cut all 4 layers at once.


Step 3: Elastic - On both pieces of fabric with the inside of the fabric towards you fold down a 1.5cm hem on the top edge and press, fold down another 2cm pin and press again. Sew across close to the fold to make a channel for the elastic.
Attach a large safety pin to the end of one of the elastic pieces and pull the safety pin/elastic through the stitched channel, pin to the top at the other end so it doesn’t pull through! Stitch both ends in place making sure to backstitch well to secure the elastic.


Step 4:  Side seams - Iron in half 2 of the 75cm pieces of bias binding and stitch along them to make the back ties (you could also use ribbon for this.) Pin the ties approx 6” from the bottom of the top at the back on both sides on the right side of the fabric, the ends of the ties will get sandwiched into the side seams.
French seam the side seams. A French seam is a double stitched seam, start with the wrong sides of the fabric together and stitch a half centimetre seam, then turn the fabric to have the right sides together and stitch a second line with a 1 centimetre seam to conceal the raw edges.

Step 5: Straps - Find the middle of one of the remaining pieces of bias binding, pin this to the underarm seam on the inside. Open up the fold on the binding and stitch to anchor it to the armhole edge of the top on the inside, repeat this on the other side of the top. Then starting at one end fold over the binding and stitch all the way along, concealing the edges of the armhole when you get to it. Repeat this on the other side of the top, knot the ends of the binding and tie to create straps.


Step 6: Hem - Double turn, pin and stitch a 1.5cm hem at the bottom of your top - you can embellish your top in lots of ways using trims or adding extra details. The top would also work as a childs/adults dress or longer line tunic top, if doing this you may need to make the rectangles of fabric wider at the bottom edge to fit over your hips.


Anna Vickery 2013 Ó

Tuesday, 6 August 2013

Sew Your Own RaRa Mini Skirt

   DIY - Sew Your Own RaRa Mini Skirt


This is a patternless tutorial for a  RaRa style mini shirt with 2 gathered tiers and an elasticated waist.

Materials:
80cm spotty cotton fabric (114cm wide)
30cm plain cotton fabric (114cm wide)
75cm of ½” wide elastic
Matching thread
Sewing machine
Pins/safety pin
Tape measure/ruler
Scissors/tailors chalk
Iron


Step 1: Cut - With the width of the fabric folded in half, cut a 20cm long strip and a 10cm long strip from the plain fabric and 4 equal 20cm long sections from the spotty fabric.


Step 2: Join Tiers - Join 2 of the spotty 20cm strips together to make a very long strip of fabric - place the right sides together, pin and sew using a 1.5 cm seam allowance. Repeat for the other 2 spotty sections.

Step 3: Gather - To gather stitch using the longest straight stitch on your sewing machine (no.4) and stitch about 10mm from the edge of the fabric. Do not backstitch and leave the thread ends long. Stitch along each edge of one spotty strip, sewing 2 lines through 1 layer of fabric - fold the other spotty strip in half and sew along the raw edge, sewing through 2 layers at once.
Gently pull up one of the thread ends to gather the fabric, so the strip ends up the same width as the 10cm long strip of plain fabric (114cm.)


Step 4: Bottom Tier - We are going to make the skirt from the bottom up, you are going to need lots of pins! * Remember to change the sewing machine back to a normal stitch length*
Pin both sides of the section which isn’t folded with right sides together to the 10cm long plain strip of fabric, sandwich the plain fabric between the gathered spotty fabric edges - the plain fabric should stay flat and the pins should be at 90 degree angles to the fabric edge. Sew all the way along using a 1.5cm seam allowance. Turn the fabric through (this is sometimes called ‘bagging out’) and there you have the bottom tier of your skirt!


Step 5: Top Tier - Pin the second (folded) tier of your skirt in place on the right side of the skirt, line up the top of the plain 10cm section with the gathered spotty edge, pin the 20cm long plain strip of fabric to the inside - this is going to be a double stitched seam. Stitch along through all 4 layers of fabric using a 1.5cm seam allowance. Un pin and flip the 20cm top section over the seam allowances and gathering to cover the raw edges, sew along the seam again.


Step 6: Back Seam - Because the back seam edges are the ‘selvedge’ edges of the fabric they do not need finishing (handy!) With right sides together line up the tiers and pin the sides of the skirt together. Sew using a 1.5cm seam allowance, iron the back seam open.

Step 7: Waist - Using an iron make a double fold on the top edge of the fabric, pin and sew to form a channel for the elastic. When sewing leave a 5cm gap for the elastic to go in through. Attach the elastic to a large safety pin and pull it through. Adjust the elastic to fit, tie it off and sew the gap closed.

Decorate your skirt with any trimmings you fancy and style with leggings or thick tights, heels or trainers.

Anna Vickery 2013 Ó

Wednesday, 17 April 2013

DIY Beauty Sleep Eye Mask


This week Anna is sharing her DIY Eye Mask tutorial with us, I'm already a fan after seeing this for real and I want one, now. Prepare to say goodbye to eye-bags and hello to beauty sleep. You'll of course need a dramatic peignoir and fluffy, heeled slippers to match for your boudoir attire. Enjoy the sewing x

Gwen likes the eye mask too!


Beauty Sleep Eye Mask


A lovely and unique home made present, perfect for using up scrap sized pieces of material.

You will need:

Materials:
 A piece of patterned (or plain) outer fabric, approx 25cm/15cm.
A piece of silk, or soft cotton for the lining, approx 25cm/15cm.
A scrap piece of dark coloured fabric (any) to block out the light, approx 25cm/15cm.
A piece of padding, roughly 5mm thick, approx 25cm/15cm
100cm of 25mm wide ribbon for the head tie.
60cm of bias binding, to compliment the outer fabric, for the edges.
Other bits of ribbon or bows for decoration.
Coordinating threads.

Tools:
 Sewing Machine
Scissors
Hand sewing needle
Pins
Pen
Paper to make pattern.


1.
Make the eye sleep mask pattern by folding in half a piece of paper and drawing half a mask shape. Think half a pair of Jackie O or Avaiator sunglasses but deeper in the middle. Don’t make any of the curves too tight or it will be difficult binding. Cut out your pattern.

2.
Draw around your pattern and cut out 1 x outer, 1 x lining, 1 x dark fabric and 1 x padding. Cut the ribbon for the head tie into 2 x 50cm pieces.


3.
Sandwich together the outer fabric / padding / dark fabric / lining and pin all 4 layers in place. Pin the head tie ribbon on the lining side to the edges, make sure this is level.


4.
On the lining side, starting at either side of the mask, open out one side of the bias binding and line up the edge with the edges of the mask. Stitch along the fold of the binding using your sewing machine, running all around the mask shape - fold the binding over at the start and overlap it at the finish. Remove the pins.


5.
Turn to the outside of the mask and fold around the other edge of the binding, covering the raw edges of the material layers and use the stitch line as a guide to line the binding up to, try to just cover it. Stitch around the mask on machine, backstitch at the start/finish to secure.


6.
Add any additional decoration, bows/lace/trim using hand sewing needle/thread - this could be elaborate as you want - be creative…..Sleep well xx

Tuesday, 16 April 2013

DIY - Make and Sew Pyjama Shorts

This week Anna has shared her Pyjama shorts workshop with us. This is a a really useful pattern as once you've mastered shorts you can go on to trousers and play suits very happily. You can also add a fitted waistband and pockets for a tailored look too. Enjoy your sewing! 


Pyjama Shorts by Anna Vickery


Materials Required:
1 m cotton fabric of choice
70cm approx 1cm wide elastic
Matching thread
Lace & Button to decorate
Large safety pin
Pencil
Large sheet of paper
 
1. Lie a pair of pyjama shorts (not stretchy ones!) that fit you out flat, fold in half and draw around onto paper with approx 1.5cm seam allowance on the sides to create a pattern. Add on 3.5cm to the top for the elastic channel and 6.5cm to the bottom for the hem.

2. Cut out using your pattern from cotton 2 front pieces and 2 backs - it’s a good idea to make the backs slightly wider. If your cotton has a print make sure this runs in the same direction and place the pattern square on the fabric.

3. Overlock or Zig zag stitch the sides of your 4 pieces to stop them freying.


4. With right sides together stitch fronts to backs at inner leg (short) seams, use 1.5cm seam allowance. Iron the seams open.


5. With right sides together match up fronts and backs and pin the centre seams to each other at top. Stitch the curved inside seam - leave a gap of 2cm, 2cm down from the top on the front section, this is for the elastic opening.


6. With right sides together stitch fronts to backs at side seams.


7. Turn in and iron the top edge of shorts (approx 1/2cm.) Turn down again 2.5cm, measure and pin this all around. Stitch close to the hem to create channel - you can double stitch or do a line of decorative stitching here too if you want.


8. Attach the end of your piece of elastic to a large safety pin and pull this through the channel starting at the opening created at the centre front, pin the ends together and try on the shorts - adjust to get length of elastic correct. Once happy with the fit knot the elastic ends together. Trim the ends of the elastic and hand slip stitch the opening closed.


9. Iron up the hems 2.5cm (this can be to the inside or out depending on look you want.) Turn up again 3cm, measure and pin. Stitch around the hems.


10. Decorate your shorts, I put a bow at the centre front with a button in the middle, but lace trim around the hems or bows at the sides would look cute too.

I'm thinking of making myself some of these for summer shorts in denim and stripes.