Friday, 31 May 2013

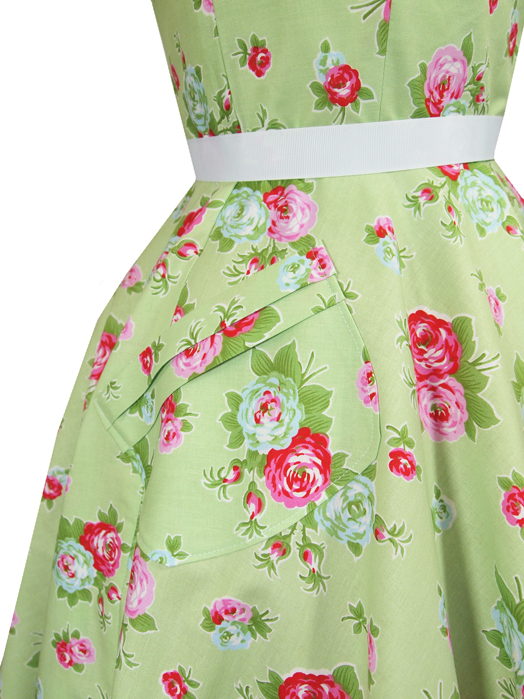
Floral Patch Pockets DIY


Pockets are some of the most useful appliques that can be added to a dress and certainly gives the garment a little more punch. 

Materials needed: 

1 fat quarter of a matching or complimentary fabric to the garment you are adding your pocket to
a fabric pen
scissors, iron and a sewing machine or needle and thread


1. Firstly cut your pockets. Measure out 20cms x 20cms square. Curve the bottom two corners to form a pocket shape.


2. finish the edges of your pockets with an overlocker or pinking shears


 3. Fold over the top of your pocket by 2.5 cms and stitch down


 4. stitch around the curve with a running stitch and gently gather. This will make it easier to top stitch around the curve.


5. pleat the top of the pocket and press the edges over ready to sewing to the garment.


6. pin the pocket in place. I like mine on a tilt where your hands naturally sit.


And there is your pretty patch pocket ..................................... Enjoy x

Tuesday, 14 May 2013

DIY - Ribbon Plait Bridesmaids Belt


Todays DIY is a gorgeous colourful plaited ribbon belt which is great to work all the colours of your wedding into the bridesmaids dresses. 


1. Start by picking your four ribbons, we used 22mm ribbon for this belt which makes a good sized plait. 
Pi them together at the top and anchor to something sturdy. 


2. The four plait wrap goes like this .... Far Left ribbon .. over , under, over .... Far left ribbon ... over, under, over ... Far Left ribbon .. over, under, over .......


3. Continue plaiting for the length of the waist measurement, tie a knot in the end and stitch the ends over if you want an edge to edge finish. 


4. Then just add a coat hook to one end if you want a clean finish or leave the ribbon loose at each end and fasten by tying in a bow. 


You can then make three of these and plait them together for a statement belt and use different trims to plait with. Just image sequins! 

Sunday, 5 May 2013

How to Cover Buttons - DIY Sewing Basics


How to self cover buttons.
Covered buttons add the finishing touch to any garment or project and self covering them in the perfect fabric makes that all important difference. Imagine those beautiful silk buttons on the back of a wedding gown or the pretty matching printed buttons on that designer cushion.
Once you get the knack they are simply and very satisfying to make.

Materials and Equipment:

fabric
metal or plastic self cover buttons and backs (available from Jaycotts)
a tailors pencil
a button covering tool (available from Jaycotts)
scissors
needle and thread


1. from the back of the button packet cut out the correct sized disc in cardboard for your button. This little piece of card is the most important thing for making buttons so keep it in a safe place.
Draw around the card into your chosen fabric. Finer fabrics like cotton and silk work really well.


2. Place the fabric disc onto the soft side of the button tool in the correct sized dip. Push your button into the dip with the fabric.


3. Put the button back onto the button and placing the hard side of the tool into the circular groove press down hard until you fell the button 'pop'.


4. the button back should be firmly clamped onto the button and you can pop out the button. Repeat for as many buttons as you need.


5. when sewing to clothing measure and mark where you will sew the buttons making sure the spacing is equal.

6. stitch on one at a time with a secure knot. 

You can then start experimenting with your buttons adding beading, layered laces, vintage embellishments ....

Wednesday, 1 May 2013

New Trims


We have new soft ruffle trims available in the shop. The black trim is quite fine and will look gorgeous added to underwear, hems or to make delicate ruffle corsages.
The ivory trim is a little more substantial like a feather boa and will make a fabulous trim to a fashion project.
These are some of the most satisfying trims to make, we'll have to show you how to make ruffles soon!