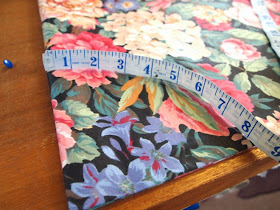
This is a DIY of how to draw out and cut a perfect full circle skirt without a pattern.
First lay out your fabric folded length-ways selvedge to selvedge.
Measure the width of your fabric. My fabric was 27 inches wide.
Measure your width length Eg. 27inches from the end of your fabric with the tape measure. Place a drawing pin through the tape and fabric at the measurement to mark the centre of your circle.
Swivel the tape measure and mark with chalk at the end to map out our circle. Keep the tape straight at all times.
Continue marking until you reach the selvedge at a 90 degree angle. You would have drawn out a quarter circle.
Cut the quarter circle and then fold over and cut the other half so you have cut a half circle.
.......................................................................................................
Next you will need to cut the waist line of the skirt. Fold your skirt into a quarter circle and anchor your tape at the corner point. This is where a little maths or lots of measuring takes place.
For a 28" waist measurement with seam allowance a 4" radius is used
For a 30" waist use a 4.5" radius
For a 32" waist use a 5" radius
For a 34" waist use a 5.5" radius
The calculation is Circumference (your waist measurement plus 1" for seam allowence) divided by Pi (3.14) and then divided by 2
Circumference / Pi / 2 = Radius.
The measurement to mark on the tape measure
It's really important that your circle is equally measured at the waist as this will dictates the hang of your skirt.
Finally cut your centre back or side seam. Any fold will work check the pattern of your fabric.
There is your full circle skirt ready to add to a waistband or bodice.
Coming up next will be how to quickly hem your skirt.


No comments:
Post a Comment